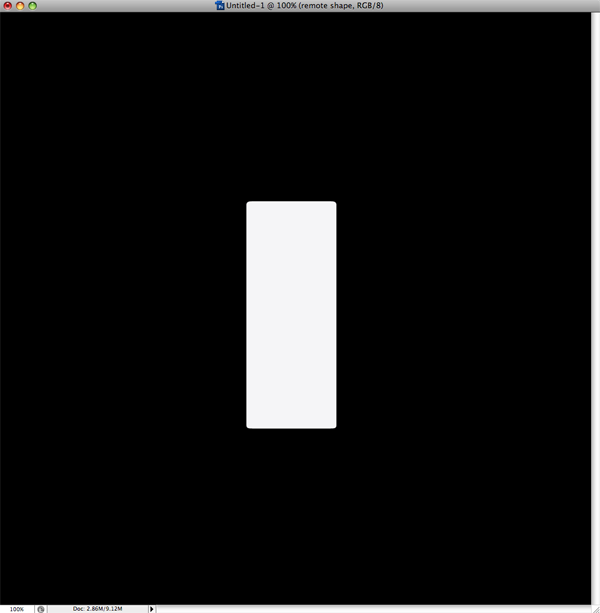
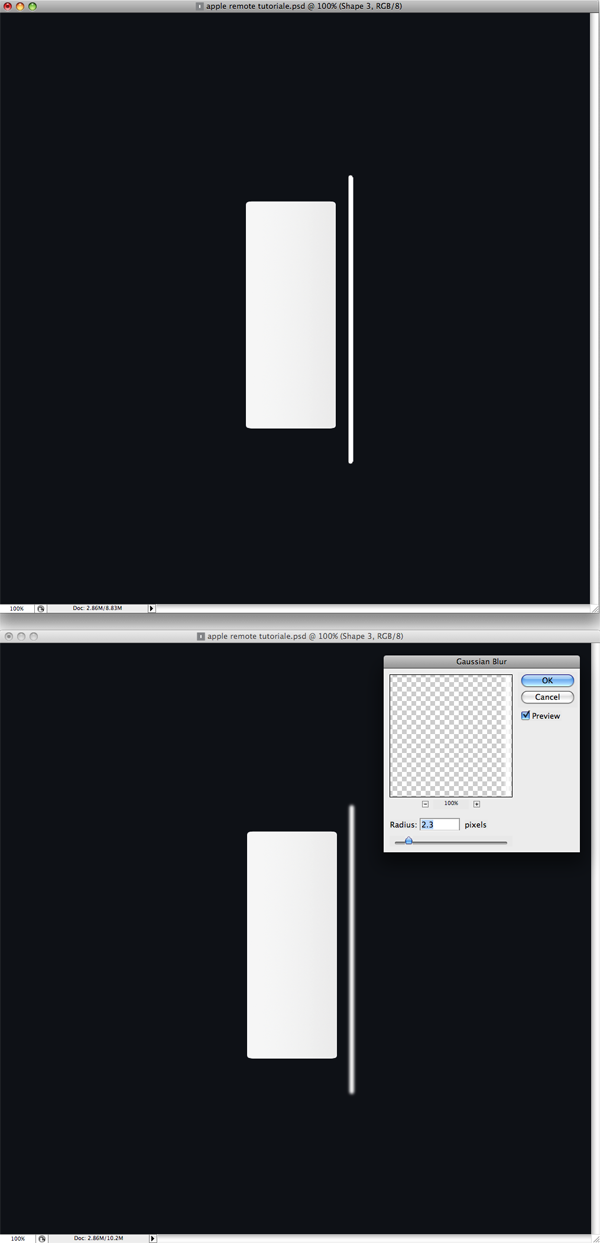
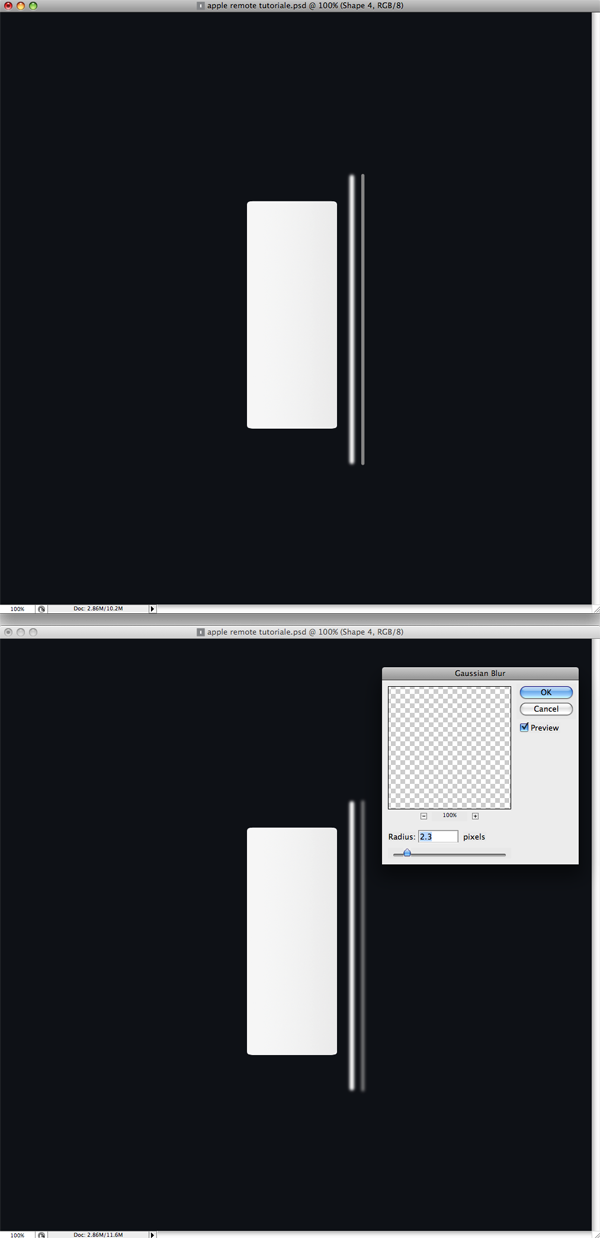
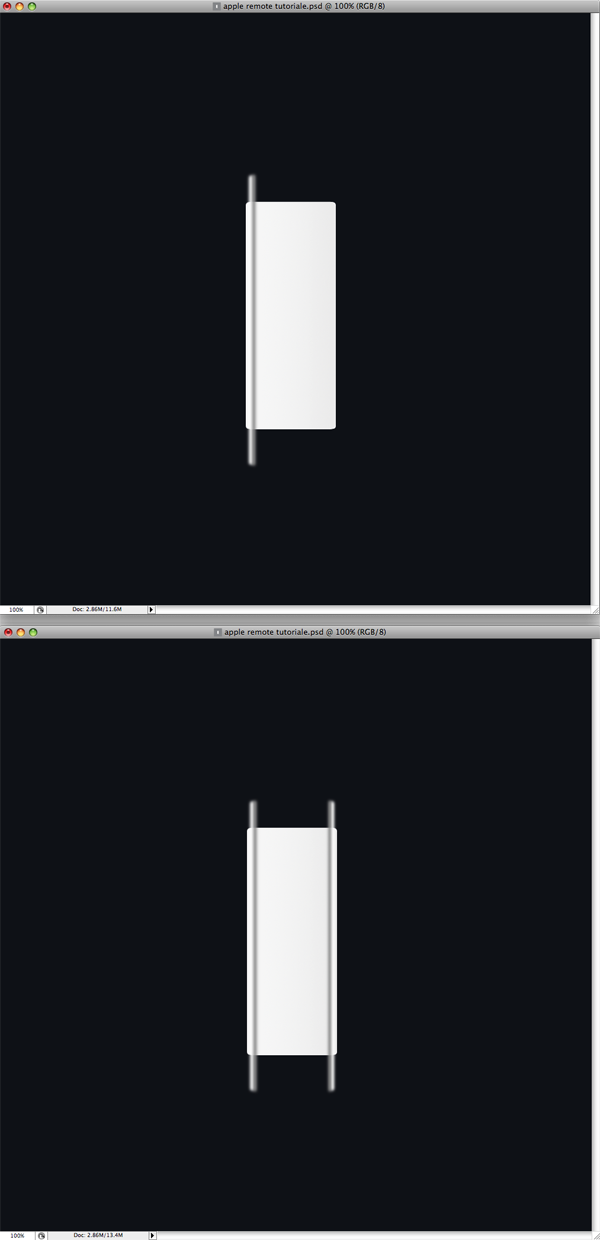
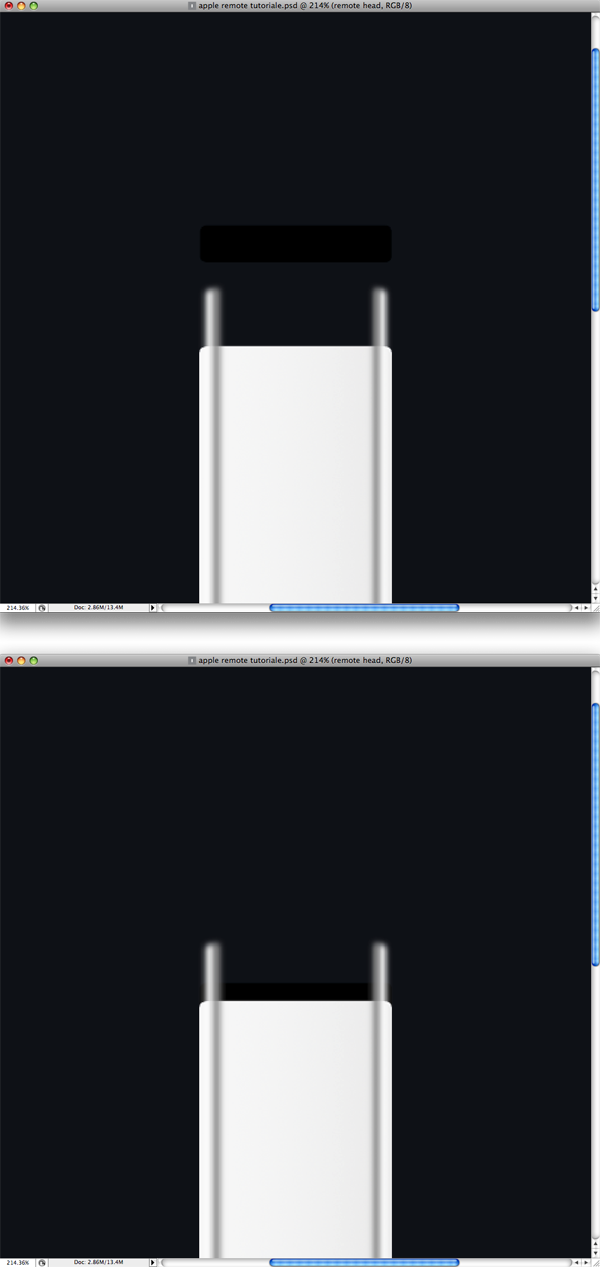
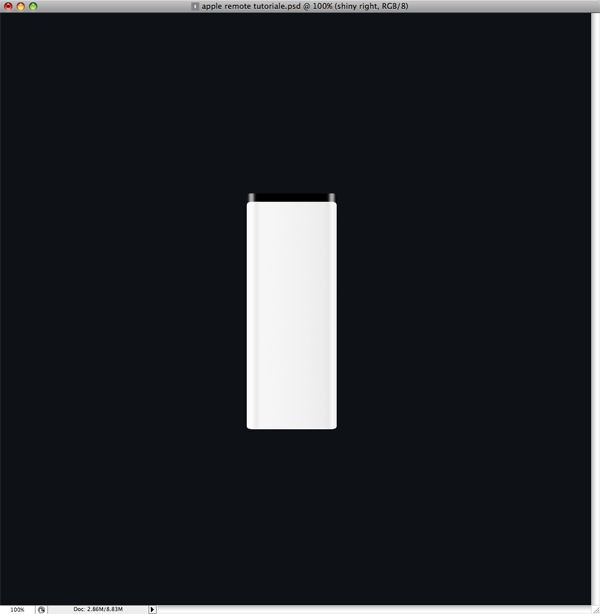
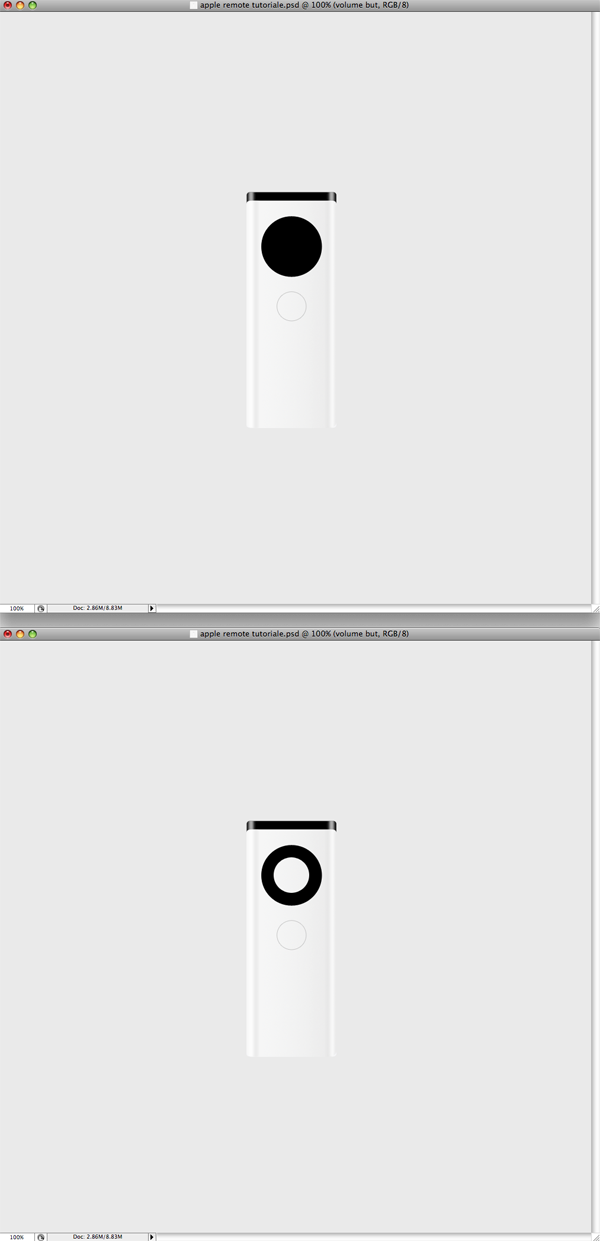
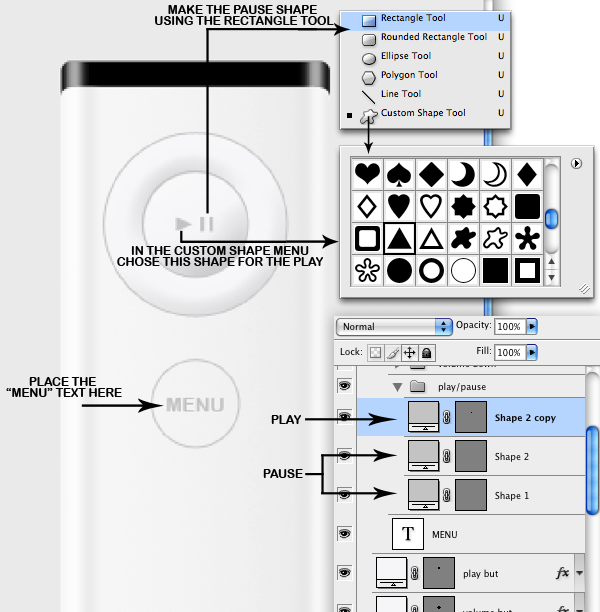
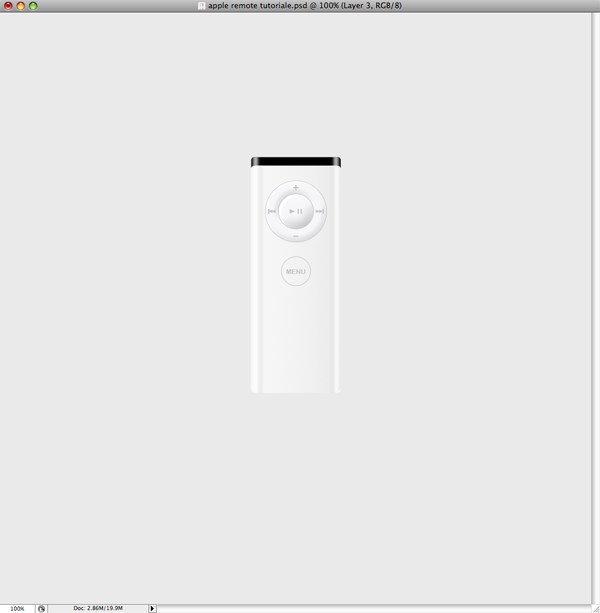
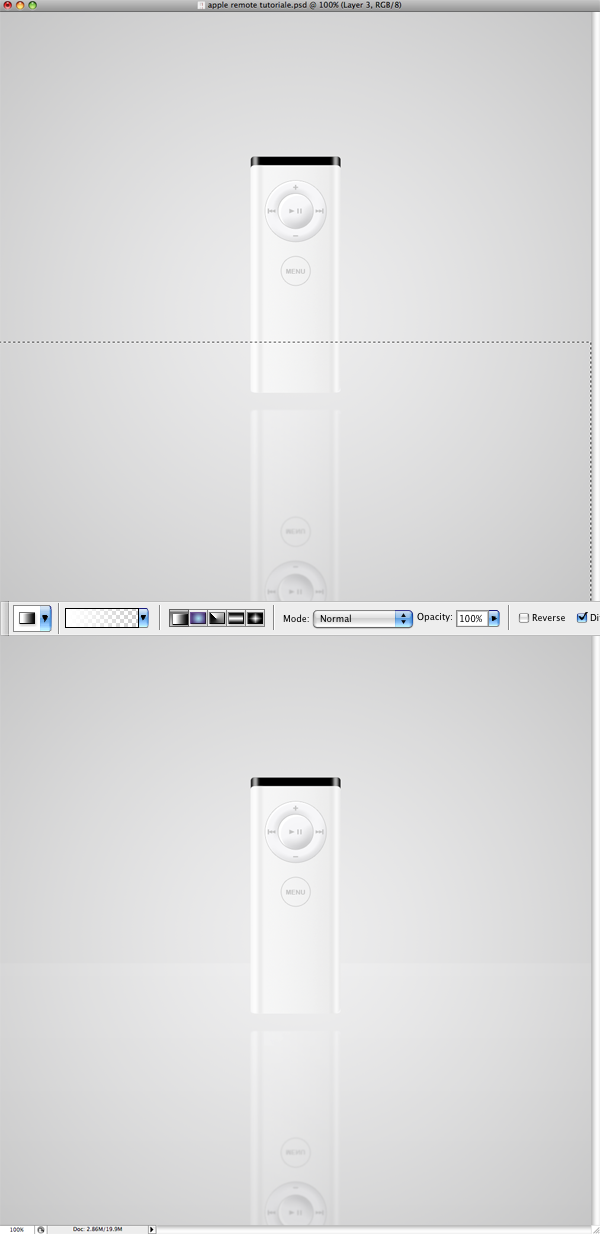
First of all, create a new document and fill it with black. Make a new shape like the next image using the Rounded Rectangle Tool with a Radius of 5px or so. You decide. Name it "Remote shape." Make a selection of this Remote Shape. Create a new layer, and using the Gradient Tool, drag from left to right. Use the settings in the image below, with left color (#ffffff) and right color (#e4e4e4). The gradient is not very strong, but it is needed to stand out a bit. Now we will add some simple shades to the shape to make it look more real. Make a white shape similar to the image below. Make sure it is higher than the remote shape. Go to Filter > Blur > Gaussian Blur and use a small Radius. Now using the same technique, make a darker shape. Make it thinner than the white one. Apply a Gaussian Blur using the settings below. Now get the white and the grey shapes closer. Move them to the left side of the remote shape. Next duplicate them, rotate them, and move them to the right side. Now we need to make the upper part of the remote. To do this, you need to make a new shape using the Rounded Rectangle Tool. Fill it with black. Then place it behind the remote shape. We need to mask the white and gray shapes for the remote. Ctrl-click (MAC: Command + Click) on the remote layer to make a selection. Then Ctrl + Shift + Click (MAC: Command + Shift + Click) to add the remote head to the selection. Make sure you have selected one of the shade layers in the Layer Palette. Go to Layer -> Layer Mask -> Reveal Selection. Do this for each shade. Now crank down the opacity of the gray and white shapes till it looks something like this. You can make the background a light gray color because now we can see the product better. The shape of the remote is finished. Now we need to add some buttons to it. First we will make the MENU button. Start by making a circle using the Ellipse Tool and the settings below. Now we need to make the Play, Pause, Fast-Forward, Fast Backwards, Volume Up, and Volume Down buttons. Start by making a new circle above the first one, making sure it's bigger. Next, we need to subtract a circle out of this one. To do this, hold Alt and Minus (MAC: Option and Minus). At this point, a Minus will appear near your cursor. This indicates that you will subtract a piece out of your shape. Click and subtract a circle starting from the middle of this big circle while holding the Alt and Minus (MAC: Option and Minus) and dragging a circle (press shift to make a perfect circle). Look at the images below to see the result. Now make the last button, which will be used as the Play/Pause button. You need to make it exactly where you just subtracted a circle. After you make it, fill it with (#f6f6f8) and use the settings below. We need to add the text that goes on the buttons now. Use Arial Black for the font and this color: (#c4c4c4). For the shapes, use the same color. Make them by using the Rectangle Tool and Custom Shape Tool. Do the same thing for the Volume and Forward/Backwards buttons. Now it's time to make the buttons a shinier. We do this by simply making a selection of the Play/Pause button by Ctrl + Click on the button. Then subtract from this selection with the Elliptical Marquee Tool. Hold Alt and drag a circle over the selection. Make a new layer. Move it on top of the other layers. Fill the selection with white. Next repeat Step 14, but this time do this shiny effect for the volume button. The remote is finished. Now we need to complete a very important step. The way we present the products is very important, so we need to make a simple and attractive background. Make a new layer and place it behind the remote. Using the Gradient Tool, set the Radial Gradient from black to white. Make sure that Reverse is selected. Now click and drag from the middle outward. Next, decrease the Opacity of this layer to 33 percent. Now duplicate the remote folder. Merge this copied remote into one single layer. Do this by right-clicking the copied remote folder and then selecting Merge Group. Next, rotate the copied remote upside down. Move the gradient layer you just made over it. Then select the remote layer again. Go to Filter > Blur > Gaussian Blur. Set the Blur to 2 percent. Next move the copied remote lower. Make a selection. Create a new layer. Make a shiny floor for the remote to reflect onto using the Gradient Tool. Click and drag from up to down. Move this layer over the remote copy. Now make the shadow that the remote will reflect onto this floor. Make a shape similar to mine. Move it on top of the gradients. Then go to Filter > Blur > Gaussian Blur. Use 8%. Next decrease its Opacity to 7 percent. Well done! You just finished the design. Below is a bonus for you guys. It covers how to simply change the color of the remote in a few seconds. Go inside the remote folder and look for the Remote Shape layer. Above it is the Gradient layer that you need to make invisible. Now go back to the Remote Shape. Chose a color for the foreground color. Then press Alt + Backspace. Tadaaa! You have a red remote. Do the same thing for the play button layer and the volume button layer. Lastly, decrease the opacity of the shiny volume button and shiny play button. And of course make the reflection for this one as you did for the first remote. Good Luck!
Apple has so many beautiful products. Their product designs consistently attain a sought-after status, which distinguishes them as an innovative company. In this tutorial, I'll teach you how to make a shiny new apple remote.Step 1
Step 2
Step 3

Step 4
Step 5
Step 6
Step 7
Step 8

Step 9
Step 10

Step 11
Step 12
Fill this shape with (#f6f6f8) and add the settings below to the Blending Options.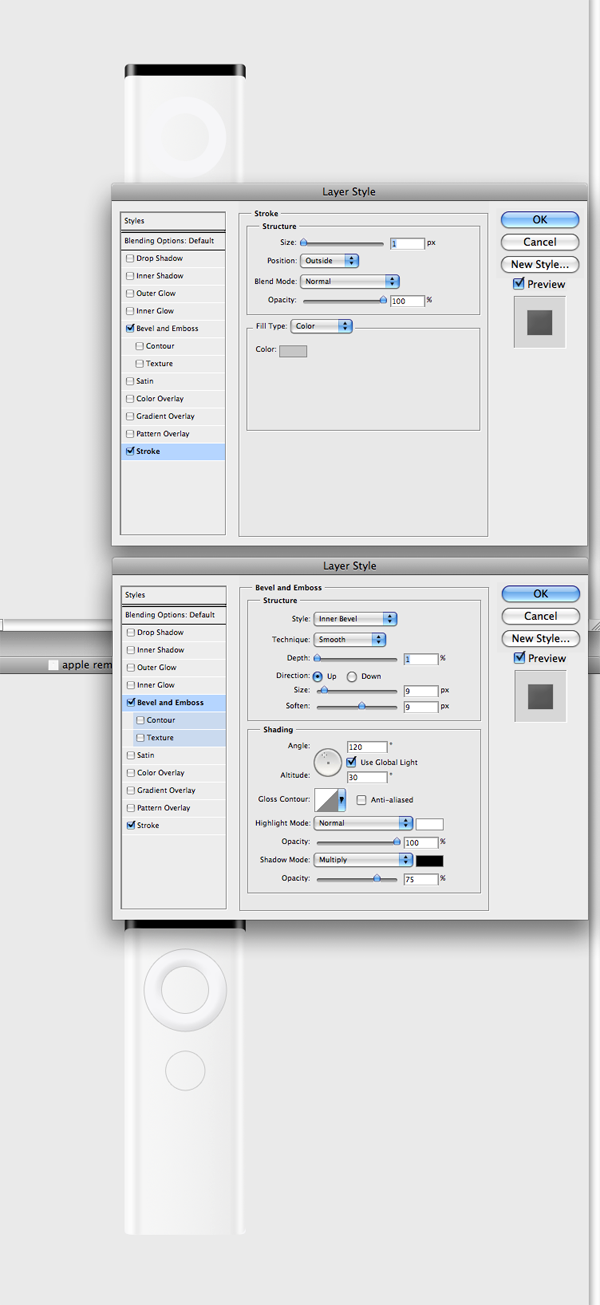
Step 13

Step 14
Step 15

Step 16
Step 17

Step 18

Step 19
Step 20

Bonus

Conclusion

![]()
Subscribe
About Me
About MiniArts
Collecting
Learning
Creating
Learning
Creating
Labels
- Graphic Design (1)
- Images (5)
- Interior (1)
- Minime View (1)
- Resources (1)
- Tutorial (4)
Baby it's U
Blog Archive
-
▼
2009
(14)
-
▼
四月
(11)
- 3 Package Design Collection
- 50 Great Examples of Infographics
- Ultimate Typographic Logos Inspiration
- Great Gooey Photoshop Text Tutorial
- Design a Shiny Photorealistic Apple Remote
- Design Resources - Brushes, Fonts and Icons
- Unbelievable Modern House Designs
- Basic Coloring Tutorial by Loleia
- 20 Beautiful Cityscape Wallpapers
- Creating Smoke
- Now start to blog some arts
-
▼
四月
(11)


2 Reply to "Design a Shiny Photorealistic Apple Remote"
♥♥♥♥♥ Jennifer™® ♥♥♥♥♥ on 2009年4月22日 09:56
your blog is good good good
Minime on 2009年4月22日 23:49
thank you.
you are the 1st one reply
发表评论